Free Crochet Christmas Stocking Pattern for Beginners
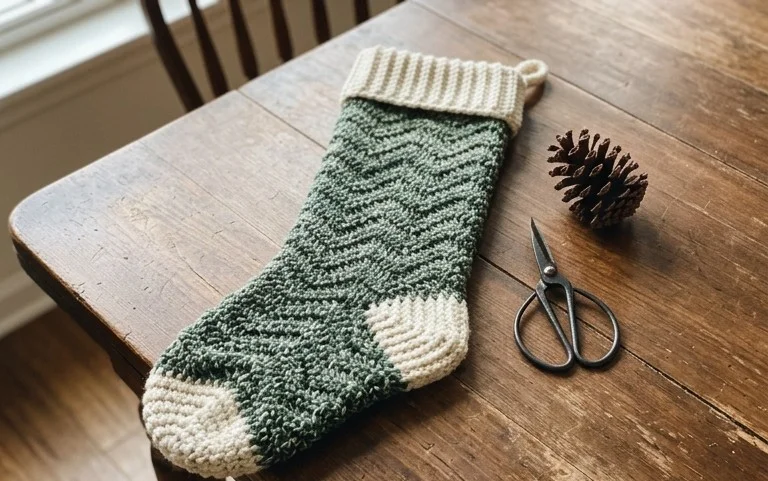
A crocheted Christmas stocking brings a handmade touch to a mantel, stair rail, or holiday gift pile. The Rainer design has the familiar stocking shape and a soft, yarn-made texture that looks right at home beside lights and greenery. It suits newer crocheters who are ready to practice steady tension and follow shaping, as well as experienced makers putting together thoughtful gifts. Working through the heel and toe gives the project a satisfying change of pace from a simple rectangle, while the finished stocking is useful year after year. In this pattern, you’ll find the materials, sizing guidance, and stitch instructions needed to make your own, along with tips for keeping the shape neat and the edges even.
Why You’ll Love This Pattern
A firm cotton stitch gives this dishcloth a slightly textured surface that works well for wiping counters and washing dishes. The pattern uses single crochet throughout, so you can focus on keeping your edges straight instead of learning a complicated stitch repeat.
It takes about two to three hours to make, and one ball of cotton yarn is usually enough. The simple rectangle is a useful first project for practicing even tension, counting rows, and weaving in ends. It also makes a practical handmade gift that is easy to fold and wrap.
My edges stayed straight, and the cotton cloth washed well after a few uses. I liked being able to finish it in an evening.
— Lena, sample maker
Pattern Overview & Skill Level
- Skill Level: Beginner. You need to know how to chain and single crochet.
- Approximate Time: 2–3 hours, depending on your pace and tension.
- Construction: One flat rectangle worked in rows from the bottom edge upward. There is no seam or border.
- Finished Dimensions & Sizing: About 8.25 × 8 inches (21 × 20 cm) after washing and drying flat. The size assumes a gauge of 14 single crochet stitches and 16 rows per 4 inches (10 cm).
Materials & Supplies Needed
- Yarn: About 80–90 yd (73–82 m) of worsted-weight cotton yarn, category #4, in one color. Cotton absorbs water and stands up to frequent washing.
- Hook Size: 5.0 mm / H-8. Check your gauge before starting. If your stitches are looser than the gauge, try a 4.5 mm / 7 hook; if they are tighter, try a 5.5 mm / I-9 hook.
- Notions: Tapestry needle for weaving in the two yarn ends, scissors, measuring tape, and a removable stitch marker if you want to mark the first stitch of each row.
- Substitutions: A smooth, washable cotton or cotton-bamboo blend can replace the cotton yarn. A blend may feel softer or drape more, while a different yarn thickness can change the finished size and absorbency. Avoid fuzzy yarn because it makes the stitches harder to see and the cloth less practical to scrub with.
To check gauge, crochet a small swatch in single crochet and measure it after washing and drying. Adjust the hook until 14 stitches and 16 rows measure about 4 inches. Gauge affects the finished dimensions and the amount of yarn needed.
Stitch Guide & Abbreviations (US Terms)
- ch: Chain.
- sc: Single crochet. Insert the hook into the stitch, yarn over and pull up a loop, yarn over again, then draw through both loops.
- st / sts: Stitch / stitches.
- Turning chain: The chain made at the beginning of a row to bring the hook to working height. In this pattern, it does not count as a stitch.
Step-by-Step Pattern Instructions
Make a foundation chain with a relaxed hand. Do not count the loop on the hook as a chain. Turn at the end of each row, and work the first single crochet into the first stitch, not into the turning chain.
- Row 1: Ch 30. Sc in the second ch from the hook and in each ch across. (29 sts)
- Row 2: Ch 1, turn. Sc in each st across. (29 sts)
- Row 3: Ch 1, turn. Sc in each st across. (29 sts)
- Row 4: Ch 1, turn. Sc in each st across. (29 sts)
- Row 5: Ch 1, turn. Sc in each st across. (29 sts)
- Row 6: Ch 1, turn. Sc in each st across. (29 sts)
- Row 7: Ch 1, turn. Sc in each st across. (29 sts)
- Row 8: Ch 1, turn. Sc in each st across. (29 sts)
- Row 9: Ch 1, turn. Sc in each st across. (29 sts)
- Row 10: Ch 1, turn. Sc in each st across. (29 sts)
- Row 11: Ch 1, turn. Sc in each st across. (29 sts)
- Row 12: Ch 1, turn. Sc in each st across. (29 sts)
- Row 13: Ch 1, turn. Sc in each st across. (29 sts)
- Row 14: Ch 1, turn. Sc in each st across. (29 sts)
- Row 15: Ch 1, turn. Sc in each st across. (29 sts)
- Row 16: Ch 1, turn. Sc in each st across. (29 sts)
- Row 17: Ch 1, turn. Sc in each st across. (29 sts)
- Row 18: Ch 1, turn. Sc in each st across. (29 sts)
- Row 19: Ch 1, turn. Sc in each st across. (29 sts)
- Row 20: Ch 1, turn. Sc in each st across. (29 sts)
- Row 21: Ch 1, turn. Sc in each st across. (29 sts)
- Row 22: Ch 1, turn. Sc in each st across. (29 sts)
- Row 23: Ch 1, turn. Sc in each st across. (29 sts)
- Row 24: Ch 1, turn. Sc in each st across. (29 sts)
- Row 25: Ch 1, turn. Sc in each st across. (29 sts)
- Row 26: Ch 1, turn. Sc in each st across. (29 sts)
- Row 27: Ch 1, turn. Sc in each st across. (29 sts)
- Row 28: Ch 1, turn. Sc in each st across. (29 sts)
- Row 29: Ch 1, turn. Sc in each st across. (29 sts)
- Row 30: Ch 1, turn. Sc in each st across. (29 sts)
- Row 31: Ch 1, turn. Sc in each st across. (29 sts)
- Row 32: Ch 1, turn. Sc in each st across. (29 sts)
Fasten off, leaving a tail long enough to weave in. Thread the tail onto a tapestry needle and weave it through several stitches on the wrong side, then change direction and weave through a few more. Repeat with the starting tail. Keep the cloth flat as you finish; pulling the ends too tightly can pucker the corners.
Care & Washing Instructions
- Wash cotton in a machine on a warm cycle, up to 40°C (104°F), or hand-wash it in warm water with mild detergent.
- Dry flat or tumble-dry on low heat; reshape the edges while the cloth is damp.
- If the cotton cloth needs blocking, smooth it to its finished measurements while damp and let it dry flat. Follow the yarn label if you use a different fiber.
Pro Tips & Common Mistakes to Avoid
- Keep your loops the same height as you work. Tight single crochet can make the cloth stiff and smaller than expected; loosening your grip or moving up a hook size can help.
- Count the stitches at the end of each row. A stitch marker in the first stitch makes it easier to spot the row edges and avoid accidentally skipping the last stitch.
- Weave in each tail on the wrong side, passing the needle through the backs of several stitches and changing direction once. A short tail tucked through only one stitch can work loose in the wash.
- For a wider cloth, add chains to the foundation; each added chain gives one additional stitch. Add rows for more length. A larger cloth uses more yarn, so have an extra ball ready if you increase both dimensions.
Frequently Asked Questions
Can I use acrylic yarn instead of cotton?
You can, but acrylic is less absorbent and may feel different when wet. Choose a smooth, washable yarn and check the label for care instructions. Your gauge and finished dimensions may change, so make a swatch first.
How can I make the dishcloth smaller or larger?
For a narrower cloth, begin with fewer chains; each foundation chain after the first gives one stitch in Row 1. For a wider cloth, add chains. Add or remove rows to change the length, and expect the yarn use to rise or fall with the fabric size.
Is this dishcloth suitable for a first crochet project?
Yes. It uses only chains and single crochet, with no shaping or seaming. The main challenge is keeping the same stitch count and working into the first and last stitches of every row.
Can I sell dishcloths made from this pattern?
Check the designer’s terms before selling finished items, and follow any credit or listing rules they provide. If you plan to sell several, wash a test piece first so you know how the yarn holds up and what finished size to list.
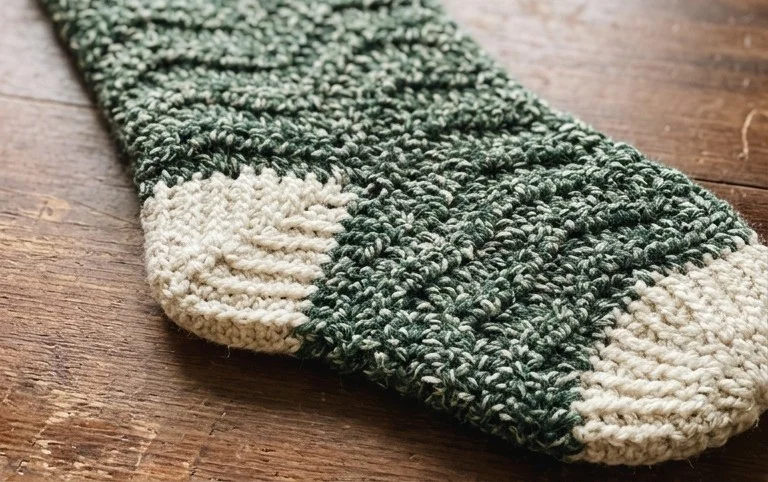
Once the last ends are woven in, you’ll have a handmade stocking ready to hang, fill with small treats, or give to someone who appreciates a personal holiday gift. You can keep the Rainer look classic with a single shade, or try a contrasting cuff or a slightly larger hook and yarn for a roomier finish. Take a photo of your finished stocking on the mantel or beside your wrapped gifts and share it on Pinterest or your favorite social media account. I’d love to see the colors you choose. When you’re ready for another handmade project, browse the blog for more free crochet patterns to work on during the holiday season and throughout the year.